
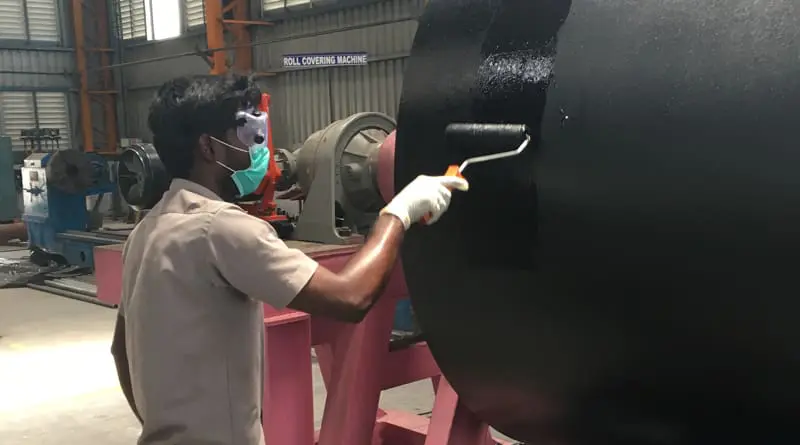
Hot Vulcanised Lagging Application

Hot Vulcanised lagging application involves the chemical cross-linking of five reactive layers during the autoclave curing process. To achieve the desired 100% rubber tear adhesion all five layers must crosslink at the same time. Occasionally conditions can be created in the autoclave that prevent this happening, and result in non-uniform adhesion around the pulley circumference. This bulletin explains how these conditions occur and what needs to be done to eliminate this problem.
BACKGROUND: Application of lagging to a pulley using the hot vulcanising process involves chemical reactions in multiple bonding layers that proceed under the elevated temperature and pressure that is achieved when the pulley is placed into an autoclave. It is the combination of chemical cross-linking at elevated temperature and pressure that produce the 100% rubber tear adhesion. The hot vulcanising process produces higher adhesion levels than can be obtained with cold bonding of lagging – it is a much more robust process that greatly reduces the variability that is inherent with cold bonding.
Like all manufacturing processes it is important to control a number of variables to ensure consistent adhesion.
HOT VULCANISING PROCESS:
There are five separate chemically active layers in the Elastotec Hot Vulcanised Lagging application process:
- Metal primer that is applied to the steel pulley shell immediately after the surface has been shot blasted. The metal primer is designed to chemically bond to the steel.
- Adhesive layer that is applied over the metal primer and chemically bonds to both the metal primer and the rubber.
- A layer of rubber cement is applied over the adhesive layer to make the surface of the pulley “sticky” so that the lagging strips can be held in place until the curing process commences.
- A layer of uncured rubber that is similar in composition to the rubber cement. This uncured layer is much thicker than the rubber cement and when the heat and pressure is applied the uncured rubber flows to fill any recesses in the surface of the pulley shell or between lagging strips.
- A layer of rubber cement is used to make the back and sides of the lagging strips “sticky” so that the uncured rubber layer remains in place until the curing process commences
See Diagram #1.
1. Hot Vulcanised Lagging Bonding System

During the autoclave curing process the chemical reaction in these five layers must proceed concurrently for rubber tear adhesion to be achieved. If one layer finishes its cross-linking (curing) process before the adjacent layers the adhesion between the two layers will be greatly reduced. From experience we know that autoclave curing above 130°C ensures that all five layers crosslink at the same time and produce rubber tear bonds.
There are circumstances where the temperature in the autoclave can be higher in the top of the autoclave than it is in the bottom of the autoclave. If the temperature in the bottom of the autoclave is below 130°C and at the same time the temperature in the top of the autoclave is above 130°C this can result in rubber tear adhesion on the top half of the pulley and poor adhesion with no rubber tear in the bottom half of the pulley.


CONDITIONS THAT CAN LEAD TO POOR ADHESION:
- Steam trap not working
- Low steam pressure
- Steam inlet into the top of the autoclave
- Pressure lock in drain line
- Faulty temperature/pressure gauge
- No flushing cycle on start up
- Nylon curing tape applied dry and/or without sufficient tension
- Use of blanket fabric in place of curing tape.
See Diagram #2.
2. Autoclave Curing of Pulley Lagging – Uneven Curing Temperature

SIGNS THAT THERE MAYBE A CURING PROBLEM WITH THE AUTOCLAVE:
- Slow temperature and pressure rise in the autoclave compared to normal operation
- Excessive water draining from the autoclave when it’s opened
- Poor adhesion on test samples.
3. Lagging Adhesion with variable Autoclave Temperature

ACTIONS TO ENSURE CORRECT AUTOCLAVE CURING CYCLE AND RUBBER TEAR ADHESION:
- Two gauges for measuring steam pressure in the autoclave
- Check steam trap function at the start of every cure (record results)
- Flushing cycle at the start of each curing cycle to ensure no pressure lock in drain line
- Permanent record (chart or PLC) of time, temperature and steam pressure for the complete curing cycle
- Apply curing tape wet (soak in water for 24 hours – do not use blanket fabric)
- Adhesion test samples placed top and bottom of the pulley as follows:
Table #1 – Adhesion Sample
DIAMETER | FACE WIDTH | ADHESION SAMPLE | |
---|---|---|---|
Small Pulleys | <500mm | <1200mm | 1 sample top 1 sample bottom |
Medium Pulleys | 500-1500mm | 1200-1800mm | 2 samples top 2 samples bottom |
Large Pulleys | >1500mm | >1800mm | 3 samples top 3 samples bottom |
4. Position of Adhesion Samples

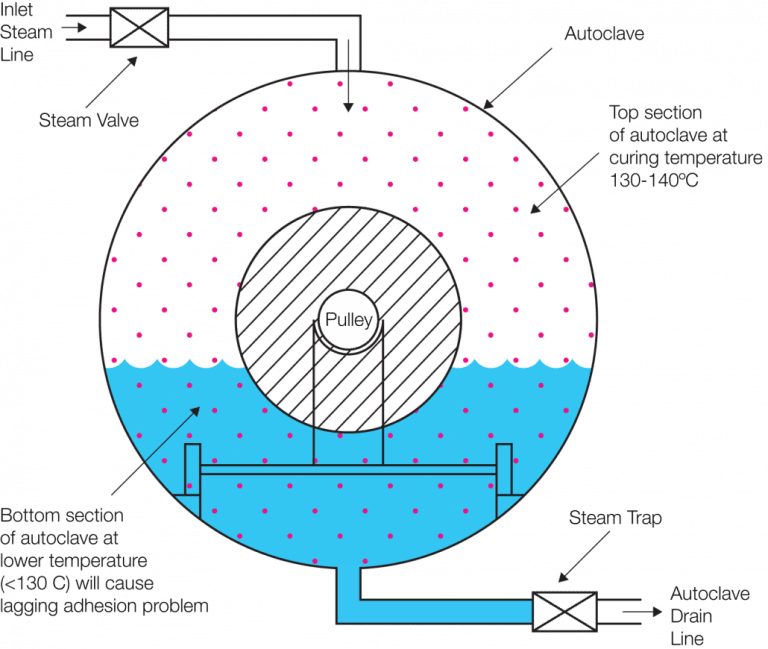
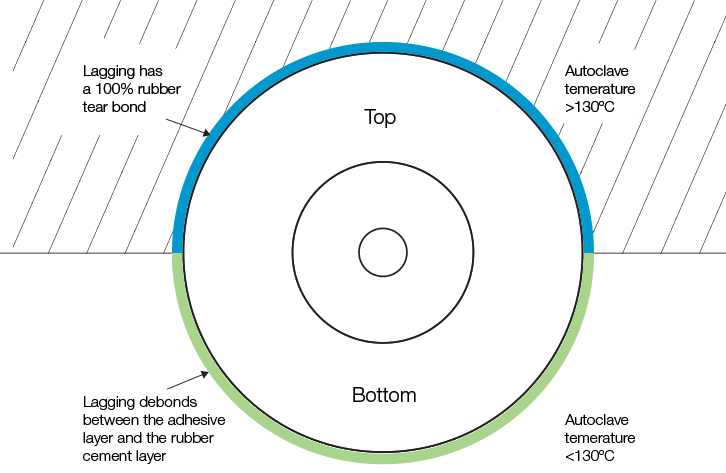
Prevention of blisters in steam heated autoclaves
This technical bulletin will outline the causes of blister formation and will detail a series of sim
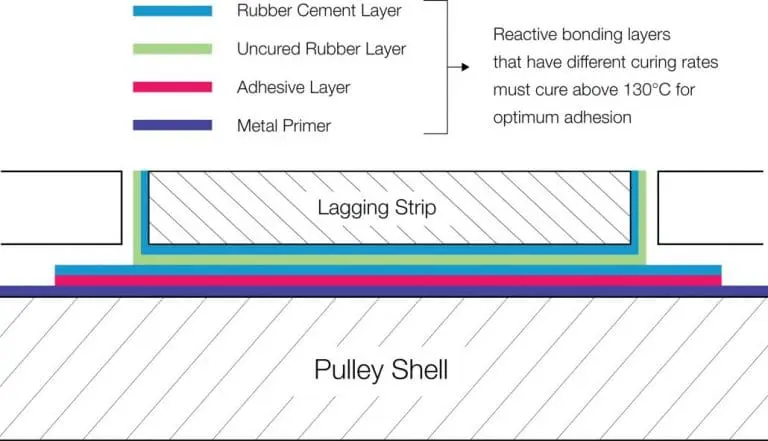
Hot vulcanised v’s cold bonded lagging
The Elastotec aim is no pulley failures due to inadequate pulley lagging. Compare the difference bet
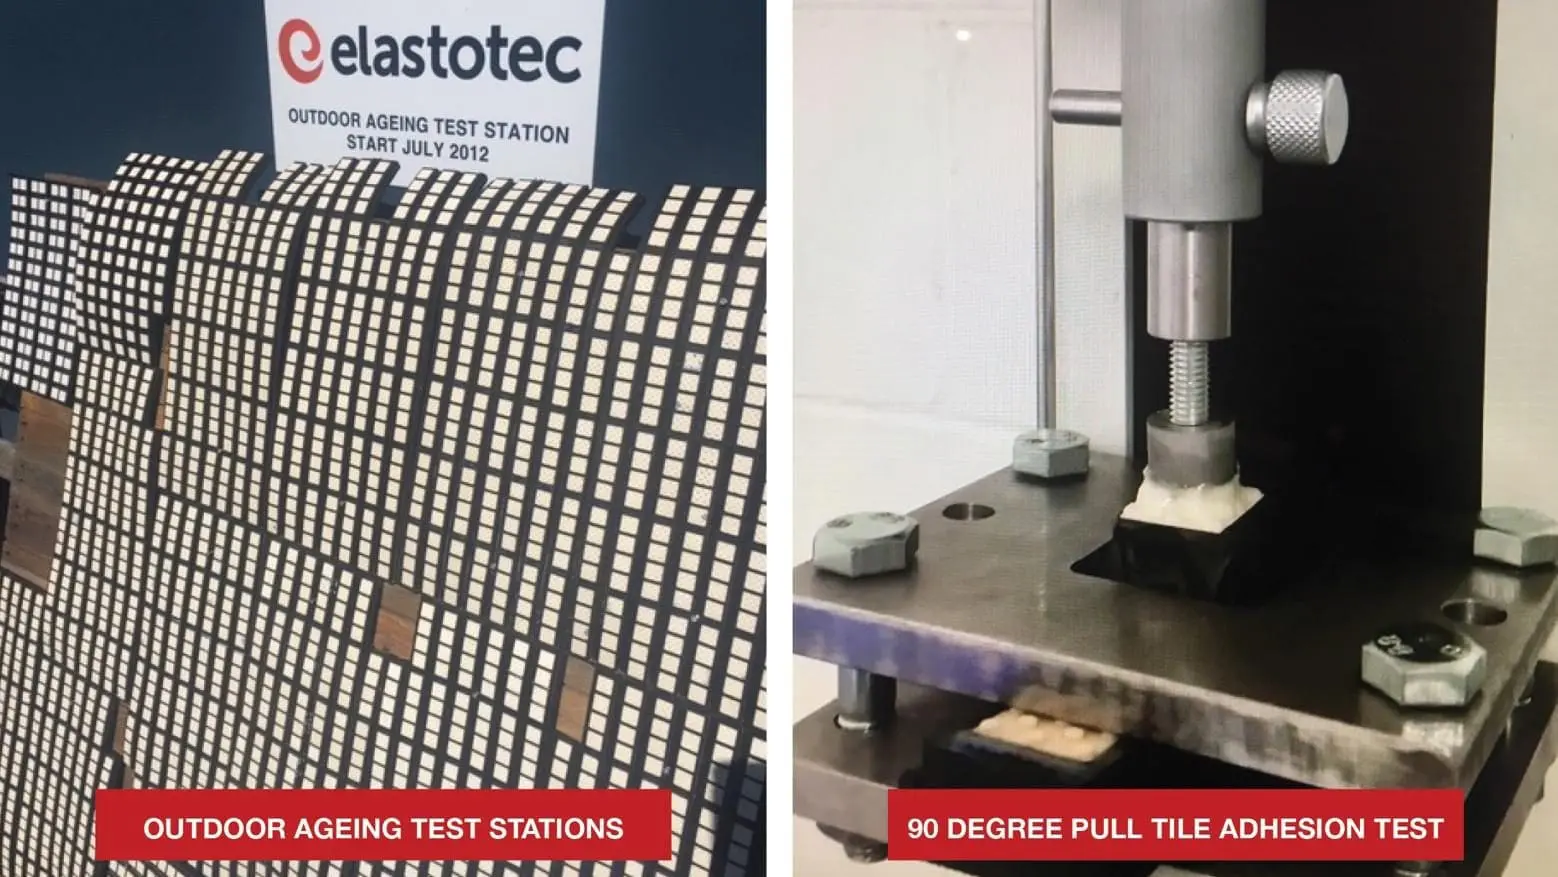
Outdoor ageing performance of Elastotec Ceramic Lagging
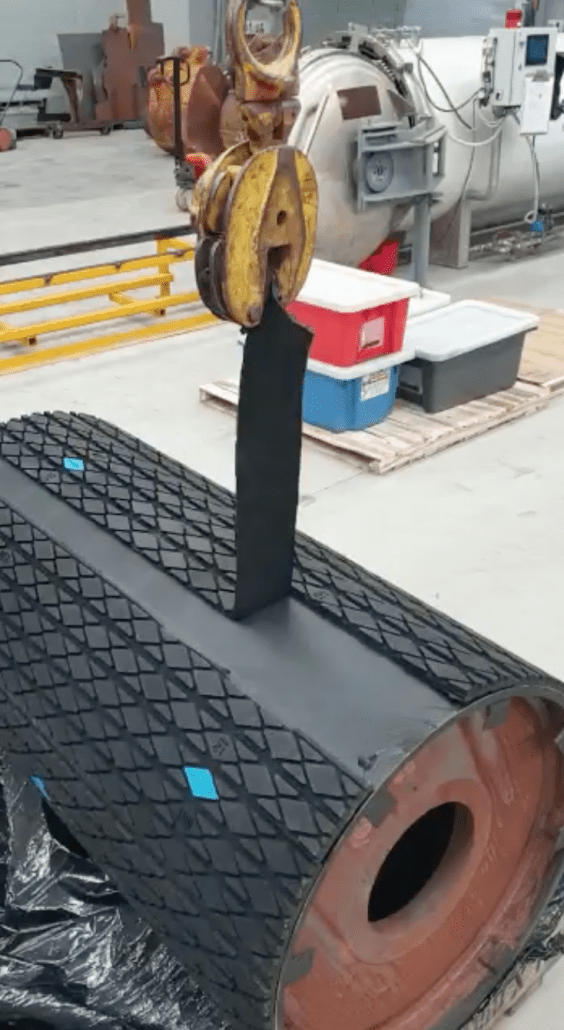
Ceramic lagging is widely used in applications that require increased levels of grip and long servic